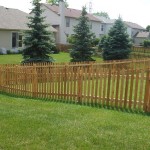
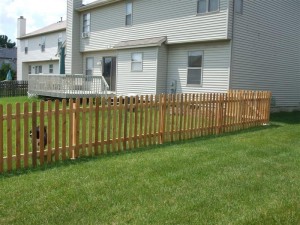
 The fence is finished! What an experience. Today I put together the gates and replaced a couple damaged pickets. The fence was pretty much done last weekend aside from the gates.
 This was a true learning experience. For those thinking about putting up your own fence, I recommend putting the project into prospective. How ever long you think the project will take, quadruple that number. I thought the fence could be put up over a 2 day weekend, it’s taken one 3 day weekend and two and a half 2 day weekends to get the fence done. Granted, I spent a lot of time leveling each picket and using screws instead of nails. I think a nail gun would have shaved 1 day off the project. Had we not run into WOW’s cable line a number of times while digging, I think we would have saved 1/2 a day digging holes too.
Anyway, fence is up and it looks great!

5 Responses
Looks great! Amazing what a lot of work can produce! Is it stained or is that still on the to-do list?
Staining is Phase 3. 🙂 No rush, need to let the wood dry out for a couple months before applying a stain. Luckily I will not have to wait long to apply a stain. I’ve been told you have to wait a year before staining pressure treated pine.
Nice job! I’m in the “thinking about it” stage. I have some questions if you don’t mind.
1. Did you did the holes one at a time (and then attach fence) as you went? Thinking I would sure hate to have measured wrong after digging all of the holes first.
2. I’m assuming you put on the individual pickets rather than the fence panels?
3. How was the cost comparison for number two?
thanks, and again…great job!
Steve
We dug all the holes at once. This is because you want to keep your tasks focused to save time. If you can get 5+ folks to help you, you could have one team dig holes with the auger and another team mixing and setting the cement and setting the posts, but looking back I would not recommend it.
You should always measure twice and cut once. I believe we actually spaced our posts 7′ 9″ in order to give us room in case some posts ended up +/- 4″ from each other. I also have two runs that were purposely more than 10′ apart to avoid utility lines in the ground. You can purchase 2″ x 4″ x 12′ cedar runs to use as extra long rails, but keep in mind that wind will apply more stress to them the further apart your posts are.
You may want to check out the first phase of the fence project, you can see how we dug all the holes first, then set the posts with braces, and then the last day we poured concrete with a rented mixer, which sped up the process greatly. Fence Phase one: http://angelo.mandato.com/2008/05/30/fence-for-dog-phase-1-complete/
For those going to do this project themselves, it is important to know that when 811 marks your lines they can be off 3′ in either direction and should always hand dig with post hole diggers in these areas.